Setting up a Raspberry Pi Kubernetes Cluster
I've been interested in learning more about Kubernetes and what better way than to build my own cluster! I think using Raspberry Pis to experiment with hardware is a great way to go. They are cheap and fun to work with.
Disclaimer
This guide is a combination of resources I found while creating the cluster with tweaks and modifications to fit my needs. Just remember this is a specific set of instructions at the specific point in time in which I chose to set up a Raspberry Pi Kuberenetes cluster using Raspbian Stretch Lite images. There might be updates to any of the software or hardware listed below that render parts of these instructions obsolete.
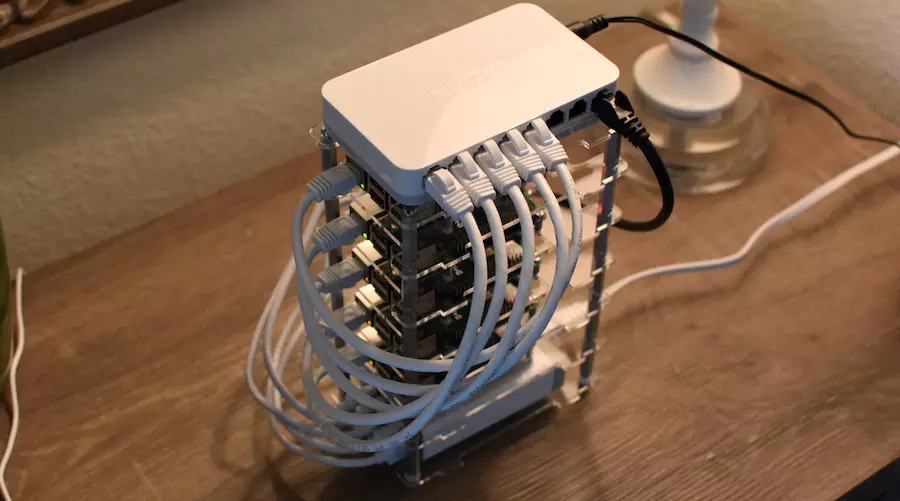
Hardware list
- 5 x Raspberry Pi 3 B+
- 5 x Samsung Evo+ SD cards
- 5 x 1ft Micro USB cables
- 5 x 1ft Cat cables
- 3 x ModMyPi Multi-Pi Stackable Case
- 1 x ModMyPi Multi-Pi Stackable Case - Bolt Pack
- 1 x Anker 60W 6-Port USB Hub
Setting up the master node
- Flash Raspbian Stretch to SD card and add empty
sshfile to boot root. This will enable ssh on startup. - Connect pi to your network router, get pi IP address and ssh up.
Change hostname to indicate it is a master node (ex. k8s-master-1):
sudo raspi-config # Network Options > HostnameCreate static IP for pi:
sudo vi /etc/dhcpcd.confAdd the following lines:
 interface eth0

 static ip_address=192.168.1.100/24
 static routers=192.168.1.1
 static domain_name_servers=8.8.8.8
Reserve IP on the router. This will ensure your pi IP addresses won't change out from under you.
Disable the swap (this is a must otherwise you will see kubelet errors!):
sudo systemctl disable dphys-swapfileInstall Docker:
 curl -sSL https://get.docker.com | sh
 sudo systemctl enable docker
 sudo systemctl start docker
 sudo usermod -aG docker pi
Update cgroup settings:
sudo vi /boot/cmdline.txtAdd the following to the end of the line, don't add a newline:
cgroup_enable=cpuset cgroup_enable=memory cgroup_memory=1Install Kubernetes tools:
 curl -s https://packages.cloud.google.com/apt/doc/apt-key.gpg | sudo apt-key add - &&
 echo "deb http://apt.kubernetes.io/ kubernetes-xenial main" | sudo tee /etc/apt/sources.list.d/kubernetes.list &&
 sudo apt-get update -q &&
 sudo apt-get install -qy kubelet=1.9.7-00 kubectl=1.9.7-00 kubeadm=1.9.7-00
Let's take a moment to reboot and check a couple things:
 sudo reboot

 # check swap is inactive
 sudo systemctl status dphys-swapfile

 # verify docker is working
 docker ps
Initialize the cluster:
sudo kubeadm init --token-ttl=0 --apiserver-advertise-address=192.168.1.100 --pod-network-cidr=10.244.0.0/16This will take a long time.
Once complete run the commands it shows in the output. This will allow you to run
kubectlas the pi user:mkdir -p $HOME/.kube sudo cp -i /etc/kubernetes/admin.conf $HOME/.kube/config sudo chown $(id -u):$(id -g) $HOME/.kube/configSave your join token. This will be used to add additional nodes (machines) to your cluster. It should look something like this:
 You can now join any number of machines by running the following on each node as root:

 kubeadm join --token <token> 192.168.1.100:6443 --discovery-token-ca-cert-hash sha256:<sha>
Finally, deploy the networking pods:
curl -sSL https://rawgit.com/coreos/flannel/v0.9.1/Documentation/kube-flannel.yml | sed "s/amd64/arm/g" | kubectl create -f -You should be able to see all system pods running at this point:
 kubectl get pods --namespace=kube-system

 NAME                                   READY     STATUS    RESTARTS   AGE
 etcd-k8s-master-1                      1/1       Running   0          9h
 kube-apiserver-k8s-master-1            1/1       Running   0          9h
 kube-controller-manager-k8s-master-1   1/1       Running   0          9h
 kube-dns-7b6ff86f69-2v28j              3/3       Running   0          9h
 kube-proxy-tdwrd                       1/1       Running   0          9h
 kube-scheduler-k8s-master-1            1/1       Running   0          9h
 kube-flannel-ds-hdlk9                  1/1       Running   0          8m
Setting up worker nodes
You will need to repeat many of the steps performed when setting up the master node except the
kubeadm init. Here is a quick recap of the commands you will need to run:# change hostname sudo raspi-config # Network Options > Hostname # set static IP sudo echo 'interface eth0 static ip_address=192.168.1.102/24 # change this to be different from master node static routers=192.168.1.1 static domain_name_servers=8.8.8.8 ' >> /etc/dhcpcd.conf # enable memory/cpuset sudo ex -sc 's/$/ cgroup_enable=cpuset cgroup_enable=memory cgroup_memory=1/|w|q' /boot/cmdline.txt # disable swap sudo systemctl disable dphys-swapfile # install/enable docker curl -sSL https://get.docker.com | sh sudo systemctl enable docker sudo systemctl start docker sudo usermod -aG docker pi # install kube tools curl -s https://packages.cloud.google.com/apt/doc/apt-key.gpg | sudo apt-key add - && echo "deb http://apt.kubernetes.io/ kubernetes-xenial main" | sudo tee /etc/apt/sources.list.d/kubernetes.list && sudo apt-get update -q && sudo apt-get install -qy kubelet=1.9.7-00 kubectl=1.9.7-00 kubeadm=1.9.7-00 # RESERVE IP ON ROUTER sudo rebootAdd the node to the cluster:
sudo kubeadm join --token <token> 192.168.1.101:6443 --discovery-token-ca-cert-hash sha256:<sha>Check node is recognized and ready on master (will take a few minutes):
 kubectl get nodes --namespace=all

 NAME           STATUS    ROLES     AGE       VERSION
 k8s-master-1   Ready     master    17m       v1.9.7
 k8s-worker-1   Ready     <none>    7m        v1.9.7
Conclusion
At this point you have a working cluster at your disposal. Next steps include running a test deployment and setting up the Kubernetes dashboard. Have fun!
References
- https://gist.github.com/alexellis/fdbc90de7691a1b9edb545c17da2d975
- https://gist.github.com/alexellis/fdbc90de7691a1b9edb545c17da2d975#gistcomment-2605323
- https://gist.github.com/alexellis/fdbc90de7691a1b9edb545c17da2d975#gistcomment-2398366
- https://www.modmypi.com/blog/how-to-give-your-raspberry-pi-a-static-ip-address-update
- https://github.com/MrChrisJ/fullnode/issues/20
- https://gist.github.com/davidbradway/ecde825a6981d8a7f99d6c7691139f9b
- https://stackoverflow.com/a/8739477